I always love to know how artists design and make their items and where their ideas and inpirations come from and also love to know how they make them.
So I thought I'd do a blog about how I create my jewellery...
I am inspired by the sea, nature and the world around me and any thing beautiful that I come across. I am also inspired by other artists and the materials I work in. I love to try out new materials and experiment.

I have my favourite materials, I love to work in metals as there is so much flexibility and options with them, but I also love to try out new things. I have played with resins, fimo, bead and many other things.
I also love saving and recycling, so like to try and use plastics, I have experimented with old plastic bags, plastic bottles and other colourful bits I've collected along the way.
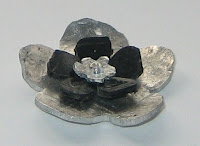
I have always loved beachcombing and finding pretty things by the sea. I always used to collect shells and unusual stones. I have recently made some items from pebbles and also shells. I have also discovered plastics on the beach as well and have used washed up cotton buds and plastics in my designs, which add a touch of colour and also help the enviroment.

So thats my inspirations, next comes the ideas...
When I get an idea I start by sketching them and drawing them out with scribbled notes around them so I remember what it was that I wanted to do.
I draw my designs onto a pad made up of reused paper, like old ltters etc so that I don't hav to cut down a forest to design my items!
Below are a couple of examples.


Once I've done this I take my sketchbook to my workbench and think about how I can make them a reality. This means a lot of experimenting (and mistakes) but it is all a learning curve and sometimes I make something I love and really want to wear. :).
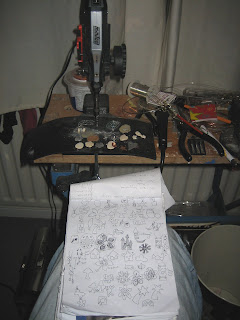
This is the space I work in, with a workbench and all my tools, so I spend a bit of time here making.
Next its time to draw my items onto the materials or metals that I want to cut out.
With a metal pendant I would first draw them onto the metal, like this
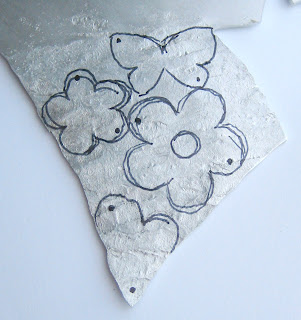
I then would drill these and cut them out, I use a piercing saw to do this and then would sand and file them to finish.
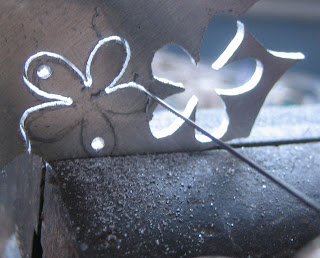
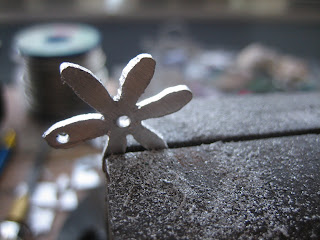
The item before being sanded and filed would look like this:
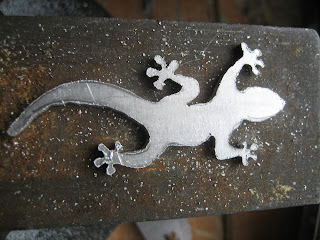
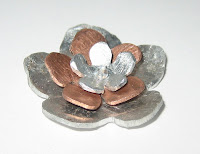
The finished item, once filed and sanded and put together would look more like this flower pendant below.

Hopefully this gives you an idea of how a piece of my jewellery comes togother, from inspiration to final design.
So I thought I'd do a blog about how I create my jewellery...
I am inspired by the sea, nature and the world around me and any thing beautiful that I come across. I am also inspired by other artists and the materials I work in. I love to try out new materials and experiment.
I have my favourite materials, I love to work in metals as there is so much flexibility and options with them, but I also love to try out new things. I have played with resins, fimo, bead and many other things.
I also love saving and recycling, so like to try and use plastics, I have experimented with old plastic bags, plastic bottles and other colourful bits I've collected along the way.
I have always loved beachcombing and finding pretty things by the sea. I always used to collect shells and unusual stones. I have recently made some items from pebbles and also shells. I have also discovered plastics on the beach as well and have used washed up cotton buds and plastics in my designs, which add a touch of colour and also help the enviroment.

So thats my inspirations, next comes the ideas...
When I get an idea I start by sketching them and drawing them out with scribbled notes around them so I remember what it was that I wanted to do.
I draw my designs onto a pad made up of reused paper, like old ltters etc so that I don't hav to cut down a forest to design my items!
Below are a couple of examples.


Once I've done this I take my sketchbook to my workbench and think about how I can make them a reality. This means a lot of experimenting (and mistakes) but it is all a learning curve and sometimes I make something I love and really want to wear. :).

This is the space I work in, with a workbench and all my tools, so I spend a bit of time here making.
Next its time to draw my items onto the materials or metals that I want to cut out.
With a metal pendant I would first draw them onto the metal, like this
I then would drill these and cut them out, I use a piercing saw to do this and then would sand and file them to finish.
The item before being sanded and filed would look like this:
The finished item, once filed and sanded and put together would look more like this flower pendant below.

Hopefully this gives you an idea of how a piece of my jewellery comes togother, from inspiration to final design.
